It’s been an ongoing debate since perhaps the beginning of time– can a person use their creative and analytical brains (right and left, respectively) with equal skill. Obviously, there were some who did it well–artist and inventor Leonardo da Vinci comes immediately to mind–but what about in today’s society, in particular the gap between web designers and developers. Should there be an overlap in skill sets?
While I admit that having specialization of labor, as a whole, has brought many benefits to society, in this particular case of website creation the two divergent mindsets are working toward a common goal. It is less like a composer and a biochemist and more like an interior designer and an architect.
Because there is a shared purpose and desired product/outcome, even if the design and development work is split between two individuals, there is the expectation that they will have to communicate to each other to reach the client’s goals. It becomes necessary,even on a basic conversational level, for both the designer and developer to understand parts of the other’s job and associated vocabulary. Ignorance here will benefit no one.
How much more of an overlap might be necessary depends on what type of services you offer individually. Obviously if you are a lone designer offering a PSD to HTML service, you’ll need to know HTML and CSS. If you are a solo web developer putting together a web app, being able to put together a cohesive user interface is a must. The right brain/left brain skill set overlap becomes then an extending of the basic level of understanding needed to interface with the other half–be it designer or developer. This is more, I believe, a matter of personal preference than a mandatory learning because it requires the individual to be confident enough in his or her skills to carry out the tasks of the other
While we can argue the merits of separation all day, the fact is that neither designers nor developers operate in a vacuum, completely cut off from the other. There is a symbiotic relationship between the two, put in place by the very nature of the work. Considering how tightly the Internet connects us all together, it seems even more counterintuitive to fight to keep the right and left brains completely divided. After all they do make up one mind.
Maybe you’ve had a successful hair salon for years and your flow of clients is in and out like a Manhattan revolving door. Or perhaps, you just started one and are struggling to pack the chairs and fill the appointment book. Regardless, both need a website. It would seem that the latter would be more in need. But here are the top 5 reasons why both do and how it benefits the one with the successful streaks AND the one that’s a little green at the roots. Because the goals of a hair salon aren’t to create just great client impressions when they walk out the door, but even before they get there or perhaps know that you exist. How so? Read on….
1stShow that You Are a Cut above the Rest ~ Perhaps you can highlight with the talent of Picasso or have the most stylish stylists in a 50 mile radius- if you don’t advertise it, word of mouth is probably not enough to keep your book of business on the incline despite a declining economy. Grooming is one of the “extras” that many people can’t justify when the light bill is due and groceries are in need. In today’s tough economy improving the growth and profitability of your hair salon needs to be a high-priority and this is one tool you’ll want to have in the kit. Having a website shows potential and repeat customers that you really mean business about your business. It reflects another level of professionalism for clients and to the industry. Remember, the goal is to create a great impression on a client both before they come to the salon AND after they see their reflection in the mirror.
2nd Add Social Media Presence to Your Menu ~ Running a hair salon requires interaction with a lot of people and why not let that network work for you. What do I mean by that? I mean getting people to Like You on Facebook, connect with you via Linked-In and chat about you on Twitter. With constantly changing styles, promotions, and products you shouldn’t have a problem finding topics to talk or Tweet about. This is an ever-evolving industry and you can take advantage of that using the free resource of Social Media. Use it to show others that you are tapped into the most current trends in hairstyling, makeup, products or whatever your salon may specialize in. And speaking of specialties, if you have one in particular-like you wax as smooth as a baby’s bottom or have a stylist who coifs with the precision of Edward Scissorhands-then Social Media is the perfect place to create hype about the talents in your establishment.
3rdGreat Referencing Tool for the Trade ~ A website is a great place to let your work shine and the words of your clients work for you. Often, word of mouth helps as much as it can hurt. Letting others “hear” from current/past clients does influence decisions…especially in service-providing industries. Most repeat customers would love say how Thomas keeps their true roots invisible or Shelly is a Shear-tress like no other AND see it in print! No to mention that playing to a client’s ego in this manner, is also another way to keep their business at your business. I mean this is an industry of vanity after all…
4thStylistas, the Cutting Floor to Web Design ~ A great look and feel website should engage visitors and compel them to spend time there. You are in luck in this particular industry because the variety of website designs available can vary as much as shades of blond. But you also have to know which to choose based on your demographics, clientele and other such factors. Don’t forget that when selecting one, it should reflect both your vision for your business and the clientele walking through its doors. Keeping this in mind, don’t fail to have fun with it. I mean it isn’t a law firm for goodness sake-so you can push the envelope of creativity without seeming over-the-top.
5th Picture Perfect Coiffing & Selling ~ Photo Galleries aren’t fabulous only in SoHo but can be just as spellbinding on the www while exhibiting your stylists’ work. There are various choices to do so…like a slide show, a flip/style online book or even a Virtual Tour of your Salon while talent’s in motion. It will be engaging and be a non-traditional way of showing off your talented team.
Decide Who Will Make the Cut ~ If don’t have a salon website already but are now convinced you need one, here are some considerations when choosing a website designer and/or company:
Find one that you feel understands your salons demographics and how to reflect it on the website.
Know that imagery will be crucial for your website. So make sure that you have “web-worthy” photographs to showcase the talents of your team and use stock photography where needed to beautify the site.
Make sure they will write your content with commonly used keywords that are frequently used when searching for hair salons, especially in your geographic region.
At Design Theory, we’d love to help you take your business to the next level of design and success. As such, we now have great packages specifically designed for hair salons that will help you blow away your competition.
Clean (clutter-free and simple) website designs are very popular and give your website a very professional look. Here are 5 examples of clean designs that we hope will really inspire you.
Have you ever been to a website that loaded very slowly? Did that website have some images that loaded abnormally slow, even though they weren’t that large in size? The reason for that may be that the images were re-sized improperly, most likely with a WYSIWYG (What You See Is What You Get) webpage editor such as Adobe Dreamweaver. This problem could have been avoided if the images were optimized.
Adobe Dreamweaver is a very powerful webpage editor that can be used to customize just about everything on your website, including specifying or adjusting the resolution of your images. When you click on an image you have inserted into Dreamweaver, you get the properties window, which allows you to specify the size of the image (resolution) and a host of other options.
Notice in the the above example the image file size is 4162K. That means it’s about 4162 kilobytes (or about 4 MB) which is very large. Also notice that the W and H (width and height) values are both in bold. That means that the current size of the image (266 x 140) is not the actual size of it (4096 x 2160). If you click on the refresh button next to the image size Dreamweaver will resize the image to the proper size (4096 x 2160).
If you change the size of an image using Dreamweaver’s image properties tab, you will just be changing the image’s resolution and not the actual file size. Using this method to downsize large images will make the images load very slowly.
This is NOT a good method for re-sizing an image for a webpage!
Dreamweaver wasn’t designed to be used for editing images. The purpose of the width and height boxes in the properties tab is to specify a resolution (size) for the image or object you have selected if there are no dimensions specified. A much better way of optimizing images is with Adobe Photoshop.
Using Photoshop to Optimize Images
If you have Adobe Photoshop, then you have the perfect tool for optimizing your images to display on your website. Here are some quick and easy steps to optimize your image in Photoshop:
1. Open the image (File > Open)
2. Re-size the image with the image properties window (Image > Image Size)
Notice at the top of the window where it says “Pixel Dimensions:” that the file size of the downsized image is now 109.3K which is a whole heck of a lot smaller than the original image file size of 25.3 MB.
3. Instead of “Save” or “Save As” use the “Save for Web & Devices” option (File > Save for Web & Devices).
If you look at the top right corner of the Save for Web & Devices window you will see these options:
Most of the time, I alternate between the 70 and 60 quality setting depending on the size of the image. I have set this image to the JPEG High preset, which gives the image 60 quality by default. If you are re-sizing an image for a thumbnail (320 x 240 or below) 60 is a great setting because you won’t see any degradation in quality from the original. I use the 60 quality setting most of the time, unless the image is very large (1024 x 768 or larger).
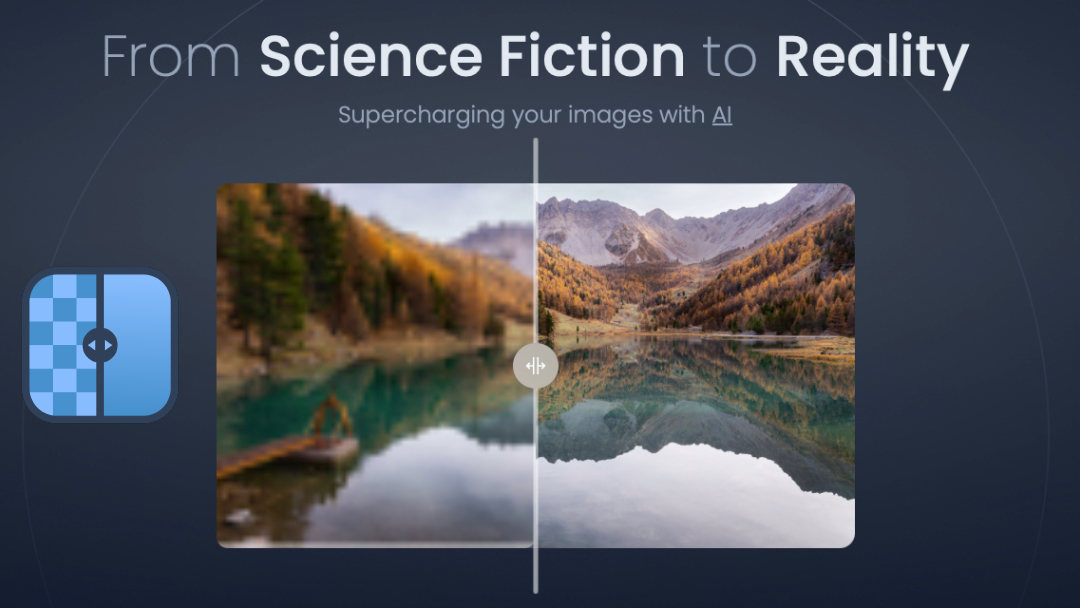
Original quality vs 60 quality
The original on the left is full quality (no compression) and the optimized on the right is 60 quality. At this smaller size, it’s hard to see any degradation in image quality at the 60 setting. As you can see, the optimized image on the right has an estimated load time of 3 seconds for a 56k dial-up connection. Of course, most users today have cable and other much faster connections, but it’s nice to know that even on the slowest connection, the image still won’t take too long to load.
4. Upload the new and improved image to your website!
Now you’re ready to load the optimized image(s) into Dreamweaver or whichever editor you use for your website.
Video of Image re-sized using Dreamweaver vs. Photoshop Method
As you can see in this video, the image that was optimized using my Photoshop method (on the left) loads a lot faster than the image that was re-sized using only Dreamweaver (on the right). The optimized image loads almost instantaneously!
Getting creative on websites can sometimes feel constrained due to traditional layouts and verbiage, and most certainly when it comes to navigation bar and menus. Many of us think that we need to have the standard, cookie-cutter menu navigation bars that have become the “norm” for almost all websites. You know the type:
Most are similar in wording and format. I’m not saying that there is anything WRONG with this per se but if you can, know that outside of conventional thinking and web design, you can get creative without compromising easy navigation of your site.
Websites are certainly your worldwide face but even the prettiest of girls can use a little makeup. Sometimes that’s demure or other times an unexpected shocking red lipstick drives home a certain affect. So can your website. Don’t be afraid to try and incorporate some artistic menu design ideas. I had a ball researching some pretty interesting and witty design elements for menu navigations.
I thought this was a great use of the industry-driven design even with the typical wording. Another idea would have been to use the bricks themselves as the navigation bar.
You don’t see many vertical layouts for navigation bars so this really stood out to me. I bet it does the same for the current and prospective clients too!
Most of us would enjoy seeing a fun and innovative menu layout. This one made me comment out loud when I saw it “oh, that’s different”!
Don’t be afraid to use representative artwork and images either with or in-lieu of typical or generic menu names. It gives a personalized look to customary naming conventions.
When to keep it standard vs. using Atypical menu choices
I would say this is probably governed by the industry you’re in. If you are let’s say a law firm, then maybe you wouldn’t use the layout above but creative wording can be your breakout of the blue suit moment. Don’t be afraid to use your thesaurus here as long as you don’t compromise the ease of use and appropriate industry jargon. Example: I’m a recent law school graduate looking to work at “JP Law Firm” and upon reviewing their website, I see a menu item titled “The Brief” (which is a legal term for a written document presented in court arguing why the party to the case should prevail). It would not be a tough leap to guess they were using that instead of “About Us”. It’s a witty play on words which can be a little amusing and personally, I’d be impressed by the break away. Not everything needs to be starched and buttoned up. So with this said: